9VA-pi: Free Animation Editor for Raspberry Pi

- 9VA-pi is a powerful FREEWARE for creating animated GIF / SVG SMIL Animation / EVA (Extended Vector Animation) for Raspberry Pi.
- You can create complex animations from fewer keyframes.
- The following sample animation was created from 2 pages figures

and 7 pages layouts as follows:

The red man is walking along the red line shown on the 6th page.
- 9VA-pi produced 80 frames for the following sample Animated-GIF from only 9 keyframes !
SAMPLE ANIMATION

How to make this Animation (YouTube)

Download
- Click link above.
- Click


- Save "9vapxxxx.zip" to Raspberry Pi.
- Extract zip.
- Execute "9va-pi" in "9va" folder.
System requirements
- Raspberry Pi (Raspbian-Wheezy/Jessie/PIXEL Linux)
- English, Japanese, (French, Korean)
FEATURES
- Stand-alone editor for Vector Animation.
- (Line, Rectangle, Oval, Freehand, Polygon, Text, Photo image , Sound, Music)
- Export Animated GIF, Sequential images (JPEG, PNG, BMP).
- Smooth Tweens (Shape, Color, Position, Size, Width, Transparency...)
- Path Animation. Time Curve.
- Vector Effects (blur, drop shadow ...)
- Import SVG (Scalable Vector Graphics).
- Export SVG (SMIL animation) .
How to Start 9va-pi on Raspberry Pi ?
- If XWindows isn't started yet, start it by typing "startx".
- Download "9vapiXXX.zip" and save it to the desktop.
(If you see this web page on your Raspberry pi,
(1) RIGHT mouse button click on the 9vapiXXX.zip ,
(2) Click 'Save as' on the menu.
(3) Save zip to the desktop. ) - RIGHT mouse button click on "9vapiXXX.zip".
Click 'Extract here' on the menu. - Double Click on "9va" folder.
- Double Click on "9va-pi' icon and click 'Execute' button to start 9VA-pi.
- Desktop icon
 and Start menu item will be created.
You can start '9va-pi' by clicking them from now.
How to play music (MP3) ?
You nead mpg321.
- Double Click on "LXTerminal' icon.
sudo apt-get install mpg321
How to Make 9VA-pi Animation ?
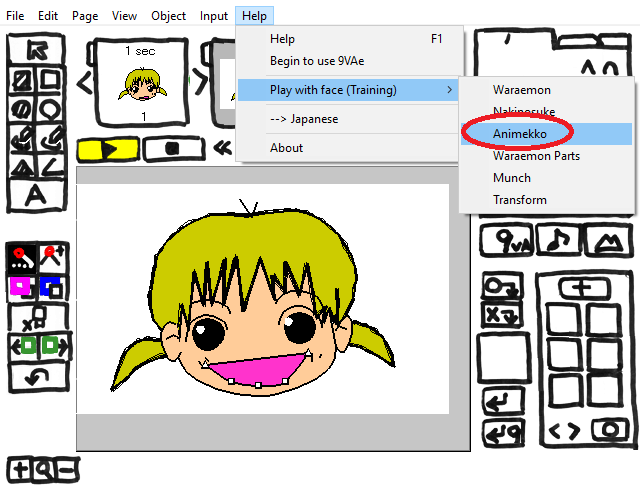
- From the Help menu, Click the "Sample Anime for Lesson" > "Waraemon". (Click the OK button if necessary.)
Sample Animation for Lesson will be opened. - Click a few times on the shape you want to change (ex. mouth, nose ... ).
Control points will appear. - Move the control points and change the shape to create laughing or funny face .
- Click on Play button
 . Nice animation will appear.
 - Change Colors. Color palette is placed on the upper right hand corner.
- Add figures. Drawing tools are placed on the upper left hand corner.
- Click on
 button on the right end of small pages. Popup menu will appear.
 - Click on the menu item "Add Next Page". The same page will be added.
Enjoy it!
How to make movie and upload to YouTube ?
- From the File menu, Choose "Sequential Images Export" on the menu.
- Input the file name (ex) aaa00000 and click OK.
--> Setting window will appear. - Input Video size, Frame/sec, Time length... (if you want)
- Click 'OK'.
--> Conversion will start.
--> You will get Sequential images (ex) aaa00000.jpg aaa00001.jpg ... - Open the terminal window. Go to the folder of sequential images.
- You nead ffmpeg (avconv). You can install it to type:
sudo apt-get install ffmpeg
- Type avconv command on the terminal.
avconv -f image2 -i "aaa%05d.jpg" -r 10 output.mov
-f defines input format.(image2 = sequence)
-i defines input file name (aaa00000, aaa00001...)
-r defines frame rate (10 Frames/sec).
--> You will get the movie file (output.mov). - Type omxplayer commmand to see the movie.
omxplayer output.mov
- You may delete sequential images after you get the movie file.
Open 'Upload - YouTube '.
Upload - YouTube
--> Input YouTube account. - Drag your movie file (output.mov) to YouTube.
DOCUMENTATION (English)
Six steps to make SVG Animation from Openclipart
How to make Animated GIF from Openclipart?
Make Animation From Openclipart's SVG With Raspberry Pi by dnjiro in raspberry-pi


